EndNote (Youtube video's)
- What’s new in EndNote 21? https://www.youtube.com/watch?v=YE4ovrxsXWM
- How to use EndNote 21 in seven minutes (Windows)? https://www.youtube.com/watch?v=TryrAvULs3Q
- How to use EndNote 21 in seven minutes (macOS)? https://www.youtube.com/watch?v=sgY3j7Kd5f8
FAQ Top 10
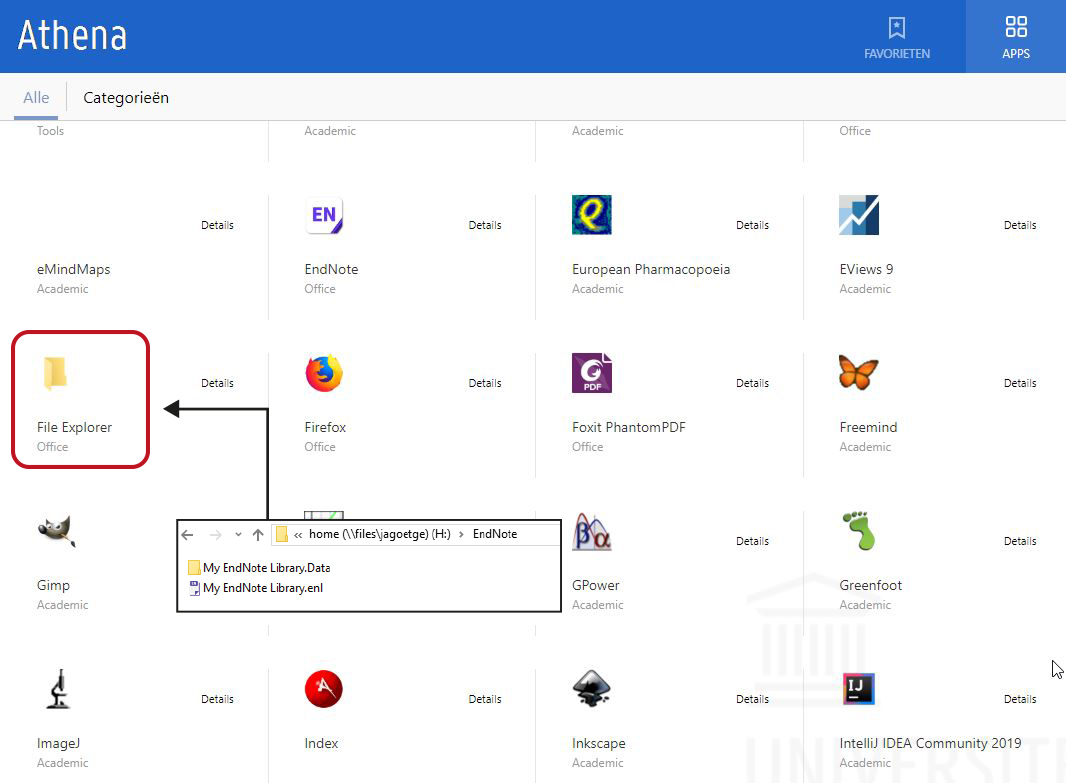
This issue often occurs when the .enl file and the .data file folder are not stored under the same folder, at the same location.
- In File Explorer, find their location in Athena and put them back together
- Tip: Create a new folder under your H-drive named ‘EndNote’ to store all your EndNote files, including your library and all PDFs with full text. This way, you can easily find them, and the .enl file and the .data file folder will remain together
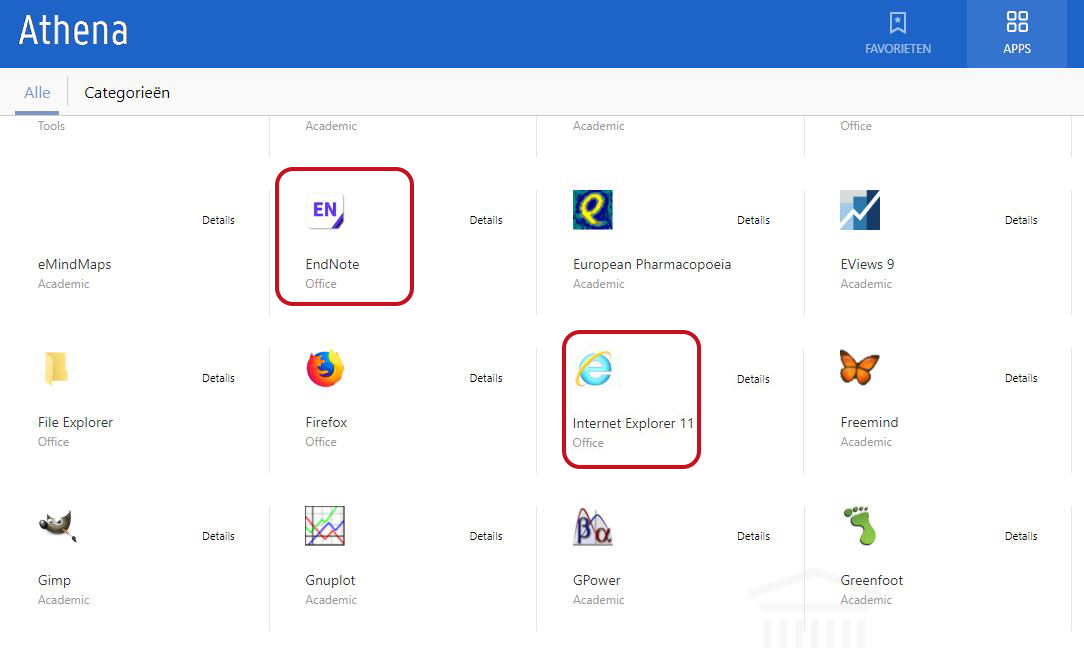
- Open EndNote, Word, and Internet Explorer via Athena to fully utilize all functionalities
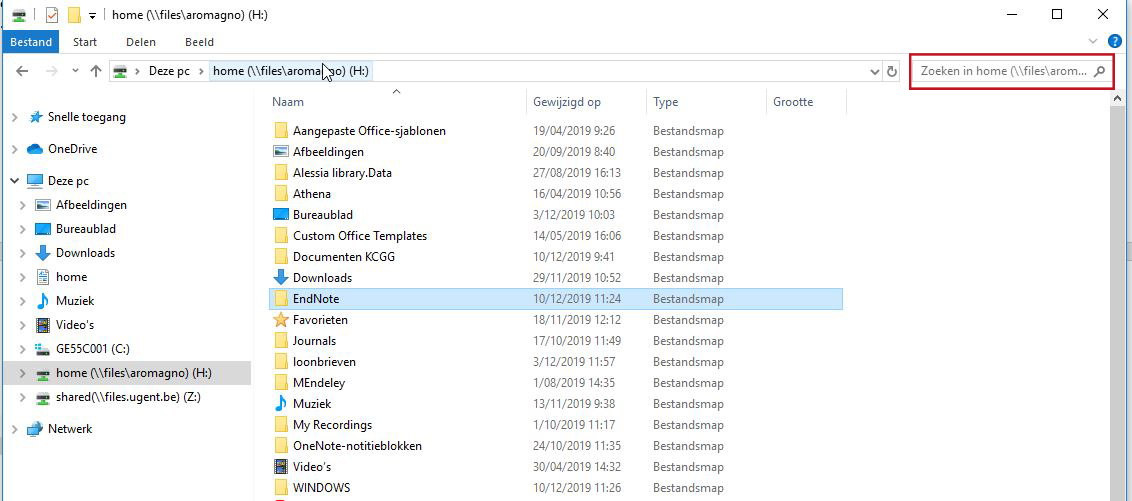
- Use File Explorer within Athena to locate the .enl file and the .data file folder of your library by using ‘Search in home’ (see image)
- Double-click on the .enl file to open your library, or in EndNote, choose File > Open Library
TIP: Create a new folder under your H-drive named ‘EndNote’ to store all your EndNote files, including your library and all PDFs with full-text. This way, you can easily find them. It’s important to keep the .enl file and the .data file folder together.
For automatic import, both EndNote and your browser need to be open via Athena.
There are two options:
- Preferred option: Close the database(s) in your browser and reopen them in a browser via Athena. Disregard the downloaded file and start the automatic import process again
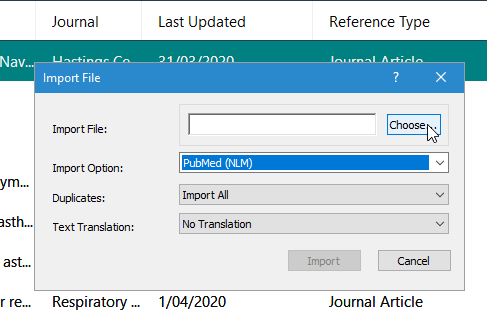
- Manual: In EndNote, click on the main menu File > Import > File. Then, open the file (usually in RIS format)
Note: With this option, you need to select an import option compatible with your database. If done incorrectly, the import may fail.
EndNote Online is the free version with limited functionalities. EndNote Basic and EndNote Web are synonyms for it. Access it through this link.
UGent pays for a license for the Desktop version for all staff and students. This version offers all functionalities, including more storage capacity. You can find EndNote Desktop on the Athena platform.
Note: If you want to share libraries via the Desktop version, you must first create a free EndNote online account.
Tip: To transfer your references from EndNote Online to EndNote Desktop:
- In EndNote Online: under the Format menu: Export References > EndNote Export as style
- In EndNote Desktop: File > Import > format EndNote Import
With the Cite While You Write feature in Word, you can insert your citations while writing and generate your reference list based on your EndNote library. You choose your output style in the EndNote tab in Word.

APA Style
This is a name-year system. The citations look like this: ([Author(s) Last Name], [year]).
In the reference list, your references are alphabetically arranged by the last name of the (first) author. Anonymous references are listed at the top.
Vancouver Style
This is a numerical system. In the text, your citations consist of Arabic numbers that refer to the order in which the reference is first mentioned in the text.
In the reference list, your references are arranged numerically in ascending order.
To adjust:
- Choose the correct style from the EndNote tab in Word
- The reference list and citations will be automatically adjusted to the selected style
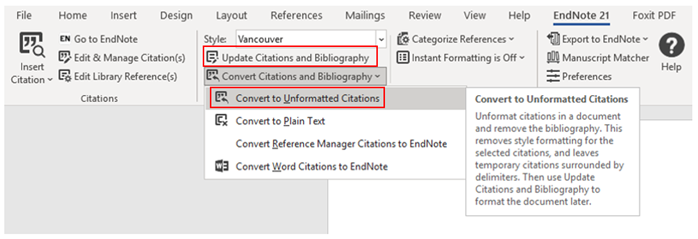
For example: {Bracke, 2010 #12;Huvenne, 2010 #14;Pauwels, 2014 #3}
- Go to the EndNote tab in Word
- Click on Update Citations and Bibliography to apply the formatting again
There are 2 ways to add your PDFs to your library:
- Automatically
- Select the references for which you want to import the full-text and click on the Search the Web button (see image)
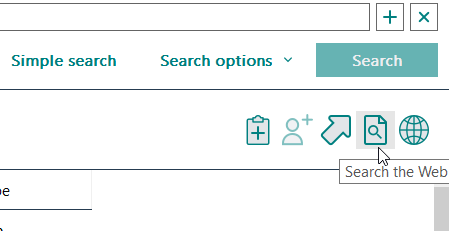
- In the left column, the temporary group ‘Find Full Text’ appears, allowing you to track the progress of searching in the databases that EndNote has access to
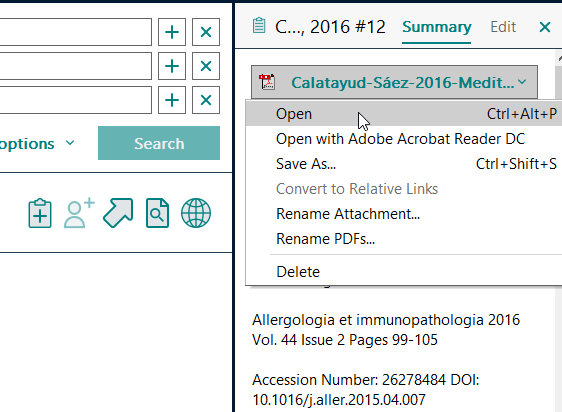
- The PDFs are automatically linked (indicated by a paperclip in the reference list) and will appear in the PDF Preview window when you select the reference

2. Manually
Due to authentication processes, EndNote does not have access to all PDFs that UGent accounts can access via the SFX button. Therefore, you need to add some of them manually.
- Download your PDFs and save them to your H-drive. Tip: create a subfolder in your EndNote folder
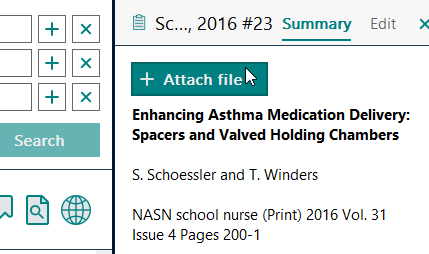
- Click on the Attach File button and link your PDF to the appropriate reference
- Open the EndNote tab in Word and click on Select Another Style
- You will have access to thousands of output styles to choose from
- If you don’t find the desired style according to the guidelines, check this page
- Download it to your PC in the same location as the other styles
TIP: Find the location of reference styles as follows: Edit > Preferences > Folder Locations
Note: Always make sure to choose and modify your reference style in Word, not in EndNote.

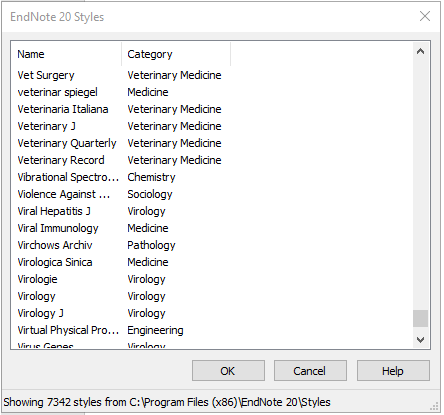
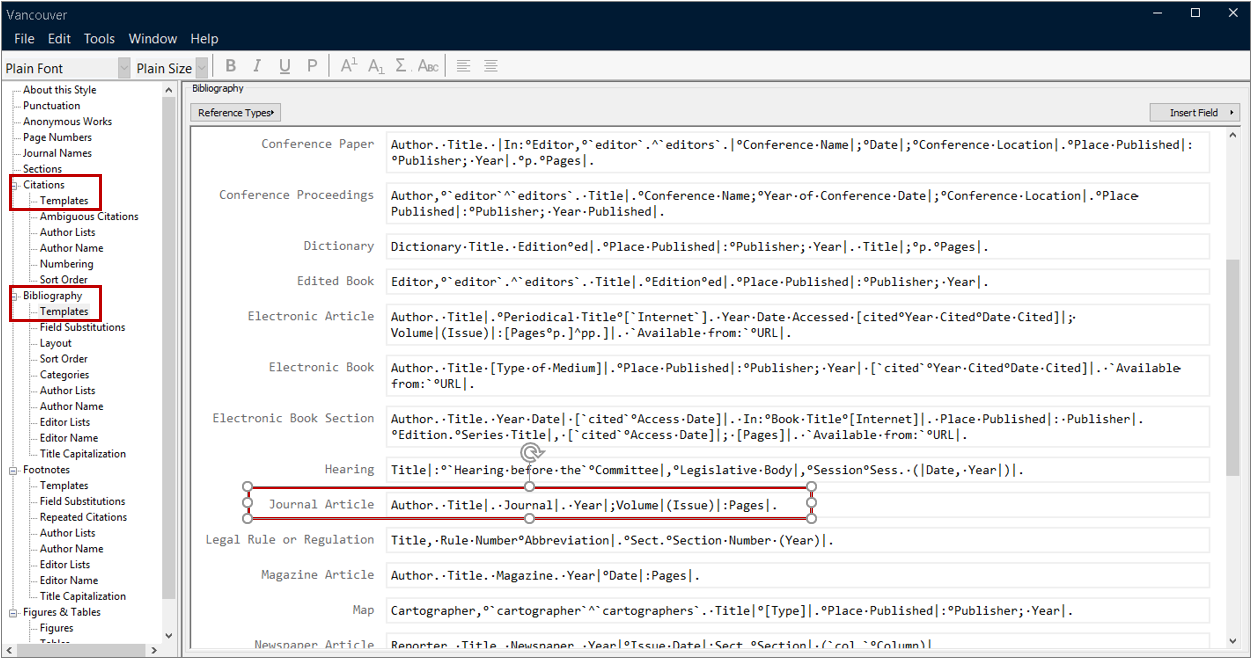
If you cannot find the appropriate reference style (see steps in question 8) or if it doesn’t fully meet the requirements, you can manually modify the output style in EndNote.
- Tools > Output Style > Edit Style ‘X’ or Open Style Manager > Choose a reference style > Edit
- Always save your modifications under a different name (File > Save As)!
- Make your adjustments under Citations > Templates (for in-text citations) and/or under Bibliography > Templates (for your reference list)
- Ensure you use the exact syntax for your changes. For example, you can copy and paste the exact notation of an item that needs to be modified from another reference type
- Don’t forget to select the modified output style in your Word document (see question 7)
- Create an EndNote Online account if you haven’t already
- Back up your EndNote Desktop library (check the ‘FAQ other’ for more information)
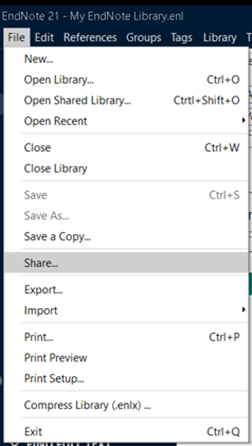
- Go to File > Share
- Enter the email address of the person you want to share the library with and select ‘Read & Write’ or ‘Read Only’ under Permission. Then click on Invite to send the invitation
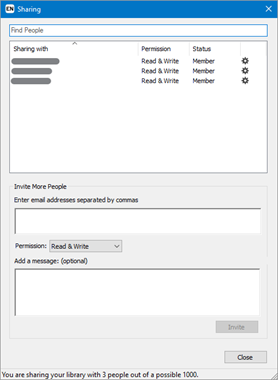
- The recipient can then accept the invitation to gain access to the shared library
- If the library is not visible to the recipient after this, they can perform a synchronization via the menu at the top: Library > Sync to view the shared library

FAQ other
There is more information about this on the KCGG website at this link.
- Click on Edit > Preferences > Reference Types > Modify Reference Types
- Add new fields in the Custom (1,2, etc.) fields (see image). Preferably, choose a field that is not automatically filled by EndNote for a specific Reference Type (e.g., Custom 3 in the case of a Journal Article)
- To make the personalized fields visible:
Click on Edit > Preferences > Display Fields (see image)
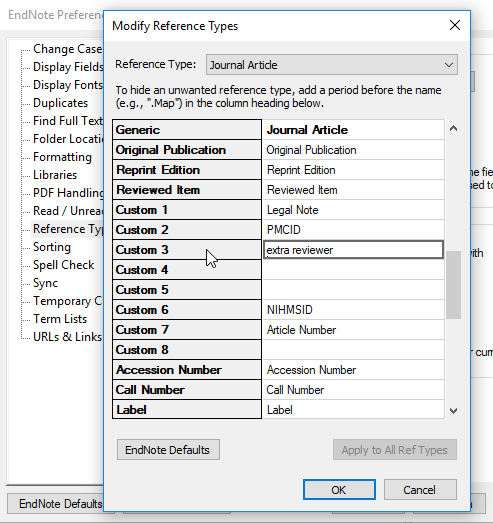
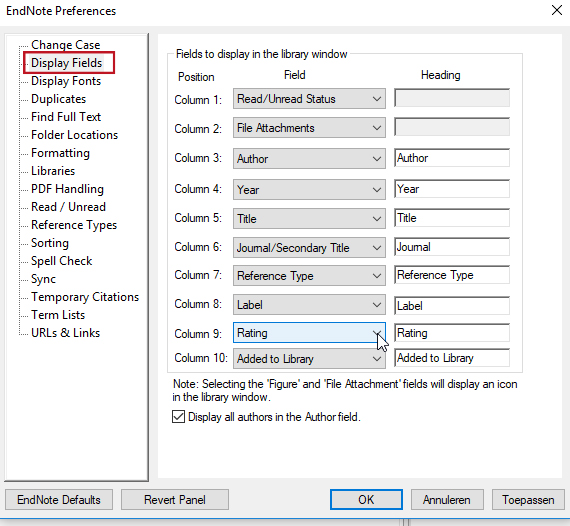
You can delete duplicate references either all at once or manually, one by one.
- Manually:
- Go to the Library menu > Find Duplicates
- To keep the correct one between the duplicates, click on Keep This Record. You can retain both versions by clicking the Skip button
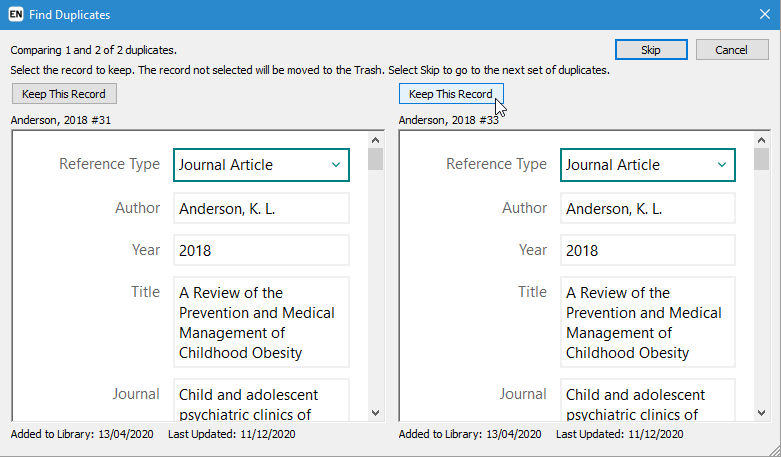
2. All at once:
- Go to Library > Find Duplicates > click Cancel
- The temporary group ‘Duplicate References’ will appear in the left column
- Return to the group where you detected duplicates. There, you’ll see all duplicate references marked in green
- Right-click on one of the marked references > Choose Move references to trash
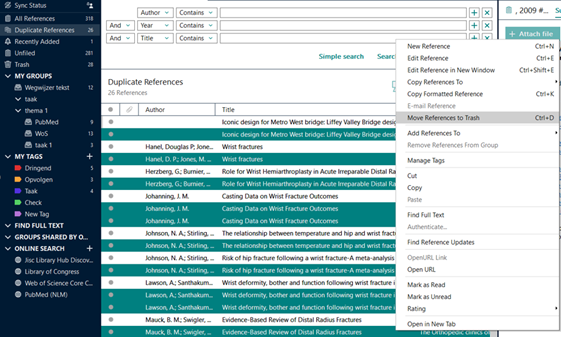
Note:
Errors can occur both in the manual and one-click removal of all duplicate:
- False positive results: references are incorrectly identified as duplicates (e.g., a conference abstract with the same title as an article, comments, corrections)
- False negative results: references are not identified as duplicates but actually are (e.g., slight differences in title or author name)
Solution:
- Remove a number of fields on which the comparison between possible duplicate records is based
- Then go to Edit > Preferences > Duplicates > untick Author and Reference Type as required fields
- You can manually review these fields for each record by making them visible through Edit > Preferences > Display Fields (tick Author and Reference Type)
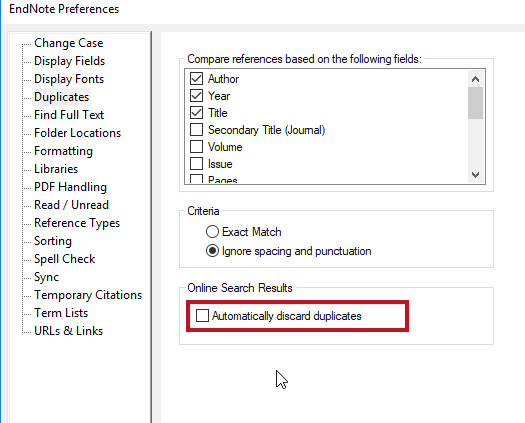
There are two possibilities:
- Separate files
- Copy both files from your library: your .enl file and the corresponding .data folder
- Save them elsewhere, but keep them together
- Compressed folder
- Click on File > Compressed Library > Save this compressed folder elsewhere
- All data is now contained in a single file with a .enlx extension
Tip: You can send this Compressed Library via email.
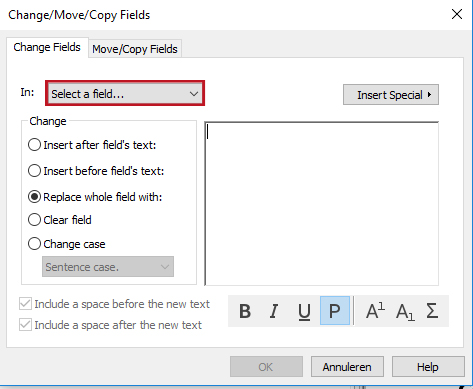
- Click on the menu Library > Change/Move/Copy Fields > select Field
- This allows you to modify fields, for example, adding a keyword to a set of references or specifying the database
EndNote can search for a PDF based on the DOI of an article that matches the information in your references.
- Check if you have already created a (sub)folder in your H-drive where you store all your full-text PDFs. It’s recommended to do this under your EndNote folder
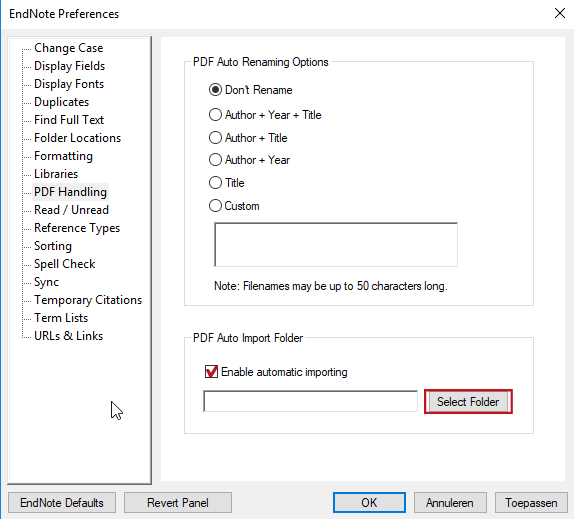
- Click on the menu Edit > Preferences > PDF Handling
- Under PDF Auto Import Folder, check the box for Enable automatic importing (see image)
- Then, select the (sub)folder under which all your PDF full-text files are stored on your H-drive
Automatic import:
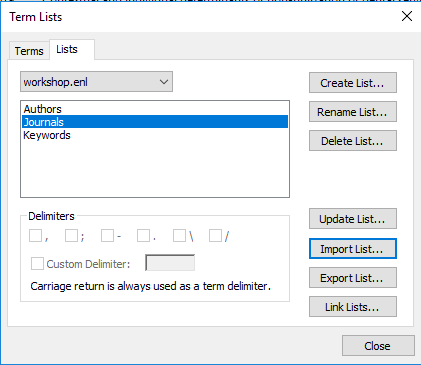
- Check if the Medical Journal Term List has been imported into your EndNote file
- Click on the menu Library > Open Term List > Journals Term lists. Click on the Lists tab > Journals > Import List > Open Medical.txt
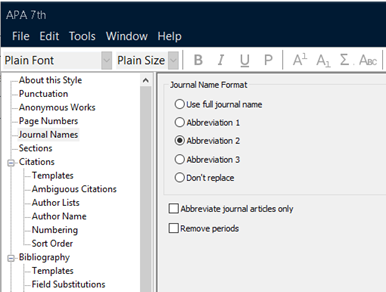
- Verify if the selected Output Style is set to use abbreviations instead of the full name of the journal
- Click on Tools > Output Style > Edit Style ‘X’ > Journal Names
- Check Abbreviation 1 for an abbreviation style with periods OR check Abbreviation 2 for an abbreviation style without periods
TIP 1:
Save the original Output Style and save your modifications under a different name.
TIP 2:
If you did not import the Medical Term List when setting up your library initially, you might encounter a situation where a particular journal appears twice after importing the list. In this case, EndNote won’t apply the correct abbreviation, and you will need to either remove one of them and/or manually adjust.
- Click on the menu Library > Open Term Lists > Journal Terms List > Terms tab > Update List. Then manually change the abbreviation
- Manually remove any duplicates in the same manner
You can share a limited reference library using a Travelling Library:
- In Word, go to the EndNote tab > Export to EndNote
- Select Export Travelling Library > A new EndNote Library and save
TIP: If you receive a Word file with references that are not yet included in your personal EndNote library, you can easily import them. Follow the same steps as above (Export Travelling Library), but click on An Existing EndNote Library instead.
Temporary groups contain references that you have recently created or imported. After closing your EndNote library or conducting a new search, this temporary group is removed. For example: importing references from an external database (see Imported References group); online search from within EndNote.
Permanent groups remain unchanged after closing and reopening your EndNote library. Examples include All References, Trash, Unfiled references, Group(sets), or Smart Groups.
Each database has a specific maximum number of references that you can import into EndNote. Below is an overview of the most commonly used databases in the biomedical and pharmaceutical sciences.
- PubMed
≤ 10 000 records:
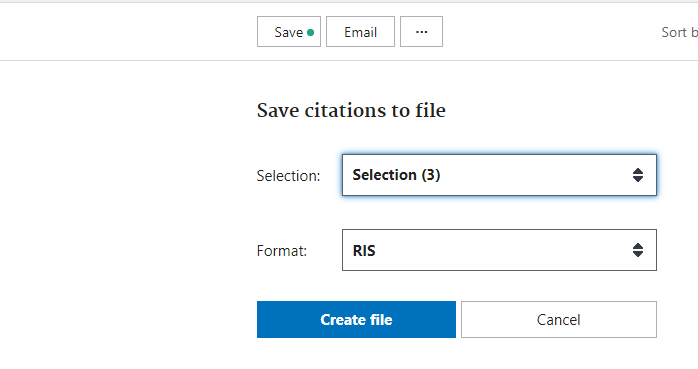
Click on Save at the top > Sent to > ‘Citation Manager’ > choose ‘Selections’, ‘All results on this page’ or ‘All results’
- Embase
≤ 10 000 records: Export > RIS format > select the number of references
- Google Scholar
≤ 20 records:
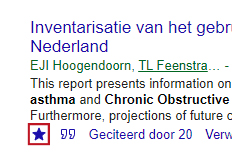
Add the necessary references to My library by activating the star
Open ‘My library’ (bottom right after logging in) and select the necessary references
Click on Export > select EndNote

- Web Of Science
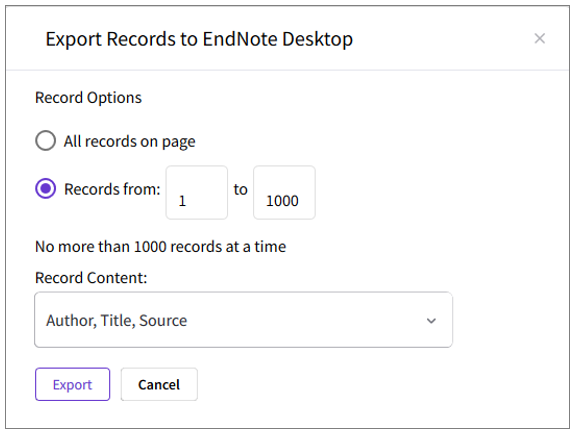
≤ 1000 records: Click on Export to > EndNote Desktop > Specify the Number of records
- CINAHL
≤ 200 records
Share > Add to folder: Results > Export
Share > Email a link to download exported results > Choose RIS format > send yourself an email and Unzip the received file, then save it (H-drive)
In EndNote: Import > select file > Check RIS as the import option
- Scopus
≤ 2,000 records: Click on Export > select RIS format > Export
If necessary, import the created file into EndNote
- Select the references you want to export > Export selected citation(s)
- Choose the Plain Text format > check Include Abstract > Download and save
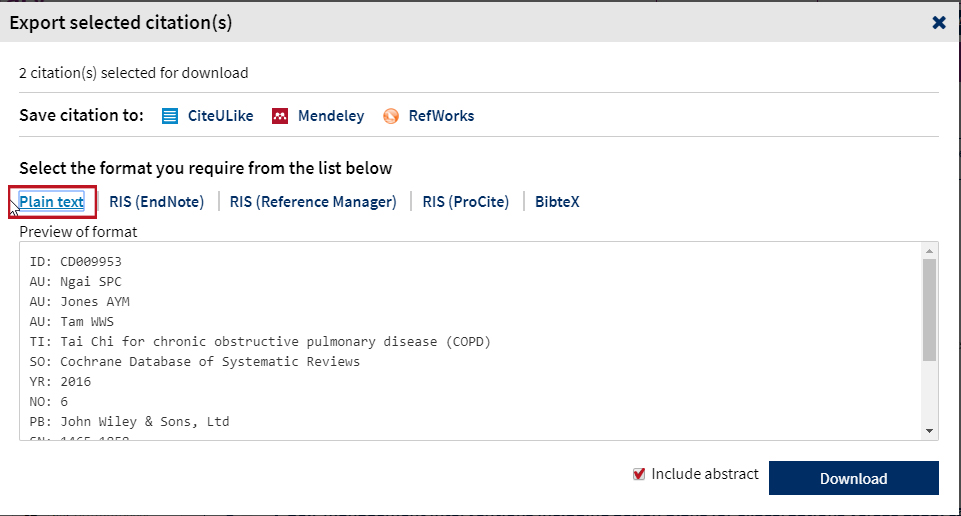
Note: Do not save as an RIS file
- In EndNote: click on File > Import > select the appropriate .txt file
- Choose the import option: Cochrane Library (Wiley) > Import
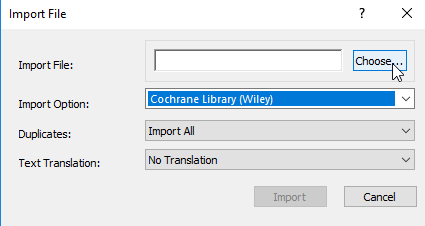
TIP 1: If you don’t want to export all your search results, save the desired references first.
Select them and click Save (top right)
- Open your list of saved references by clicking on Saved Studies > Download (top right)
- Choose the file format: Plain text > Download
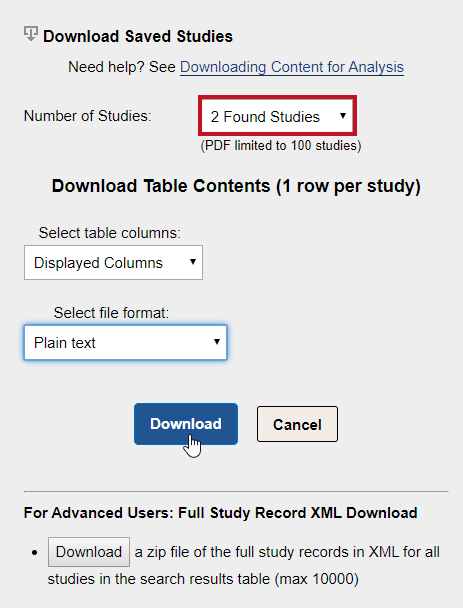
- In EndNote: click on File > Import and select your .txt file. Choose the import option ClinicalTrials > Import
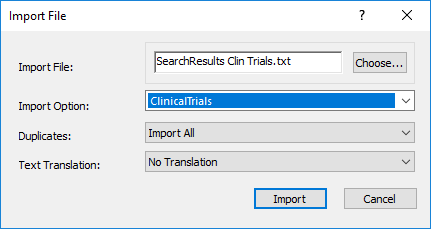
TIP 2:
Manually add the ‘Access Date’ to your reference in EndNote. Some reference styles may require this information.
- Menu References > New Reference
- Reference Type: Web Page
- Fill in the following fields: Author (person or organization), Year, Title, Access Date, URL
TIP 1: If it is a webpage from an organization, add a comma at the end of the organization’s name. Otherwise, EndNote may interpret it as a personal name. Example: World Health Organization might be converted to ‘World, H.O.’
TIP 2: If the publication date is unknown, enter ‘n.d.’ (no date) for Year. For Access Date, use the date of the first consultation.
Note: The appearance of a webpage in a reference list depends heavily on the output style selected in Word’s EndNote tab.
EndNote 21 introduces several enhancements. One of the most notable is the ability to add tags to references, allowing for even more detailed organization and categorization of bibliographic data. More information about the new features in EndNote 21 can be found here.
Compared to the older version, EndNote X9, versions 20 and 21 offer a redesigned user interface that is more user-friendly and includes more advanced features for detecting duplicate references. Furthermore, the PDF viewer has been improved for a smoother reading experience, and changes have been made to make it easier to switch between windows.
Courses EndNote
The KCGG offers short Blits information sessions as well as advanced workshops for EndNote. Click here to find an overview of the available courses.
Question for KCGG
Do you have a question related to your literature review or do you need help with searching, processing or publishing of your literature/data? Then please fill in our form to give us a clear view of your question and so that we can advise you efficiently. Alternatively, you could email us at kcgg@ugent.be.
